Docs
Getting Started with Coder Habit
Welcome to the Coder Habit documentation! This guide will help you get started with tracking and analyzing your coding productivity.
Step 1: Installation
To install Coder Habit, follow these simple steps:
- Open Visual Studio Code.
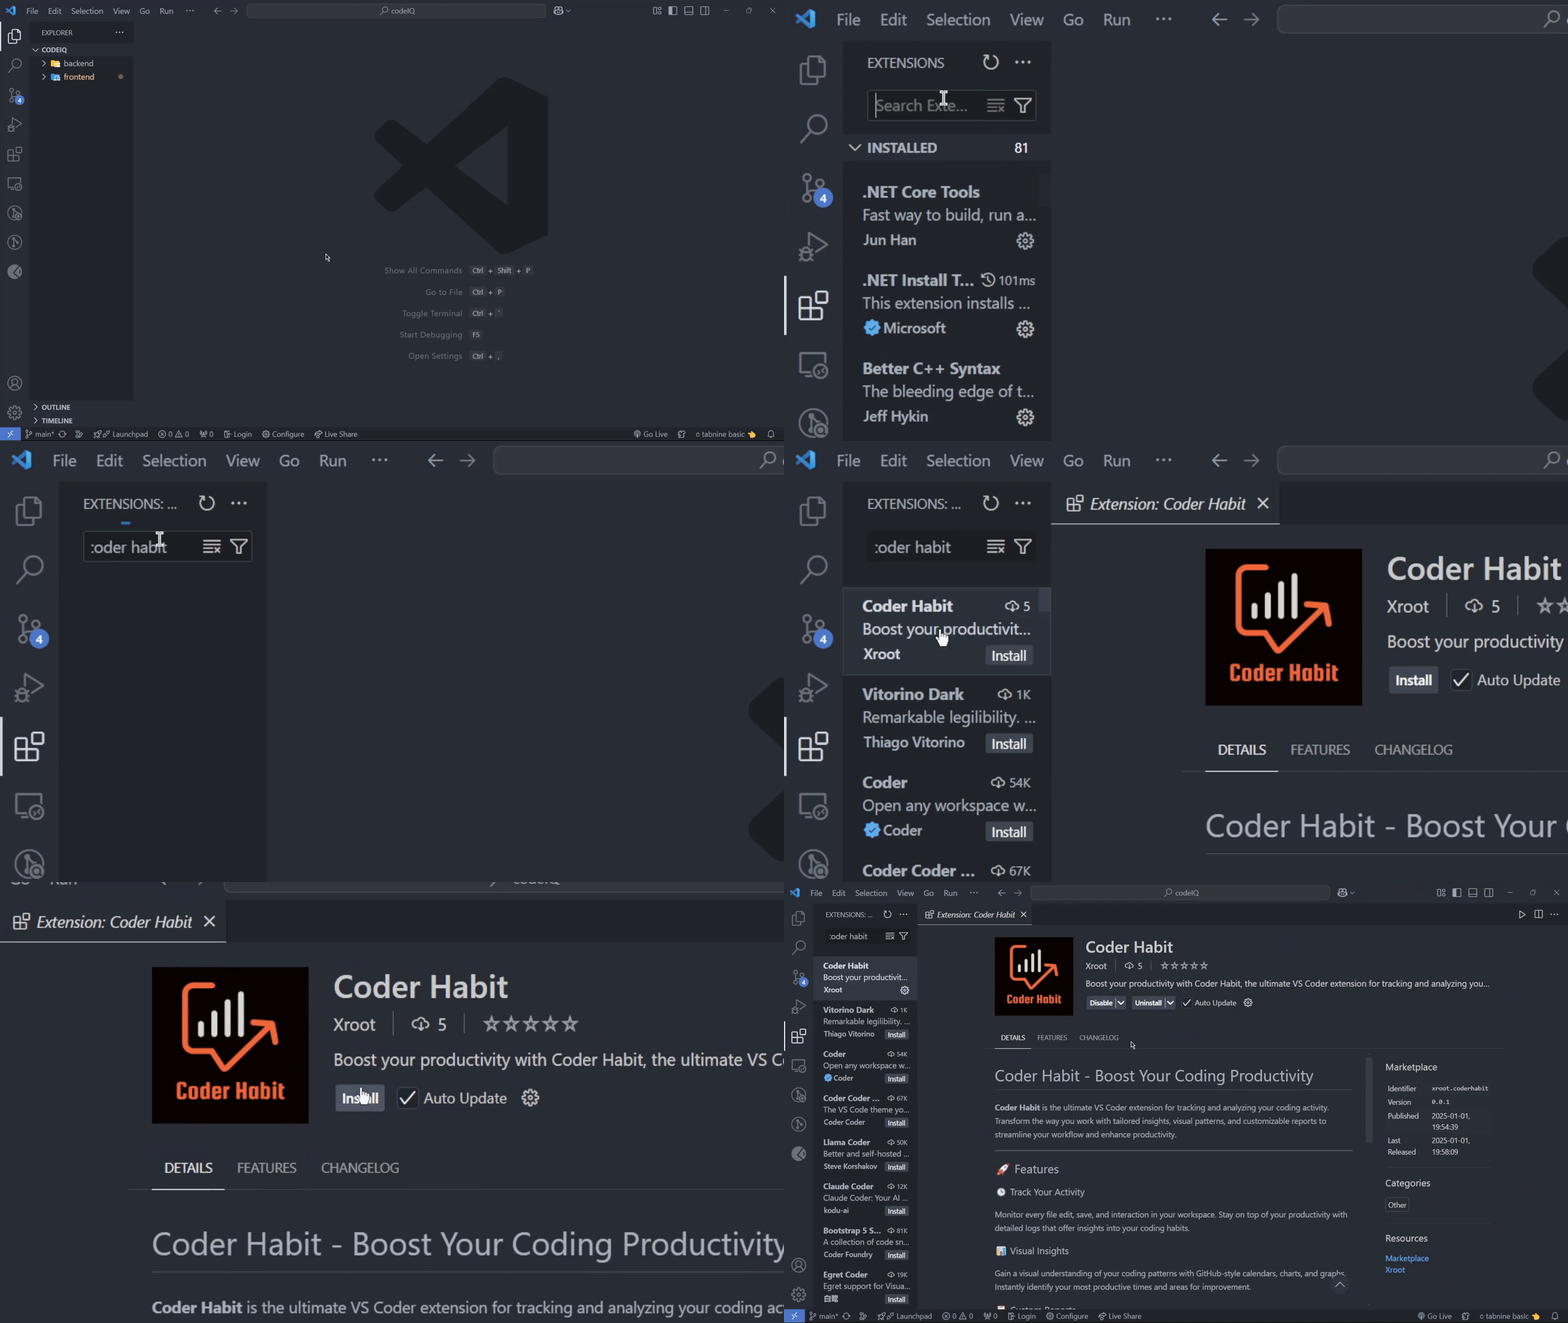
- Click on the Extensions pane on the left sidebar, search for "Coder Habit", and click "Install".
- Alternatively, you can download it directly from the VS Code Marketplace.
Once installed, you'll be ready to start using the extension!
Here’s a quick GIF showing the installation process:

Step 2: Logging In
To log in, simply follow these steps:
- Press
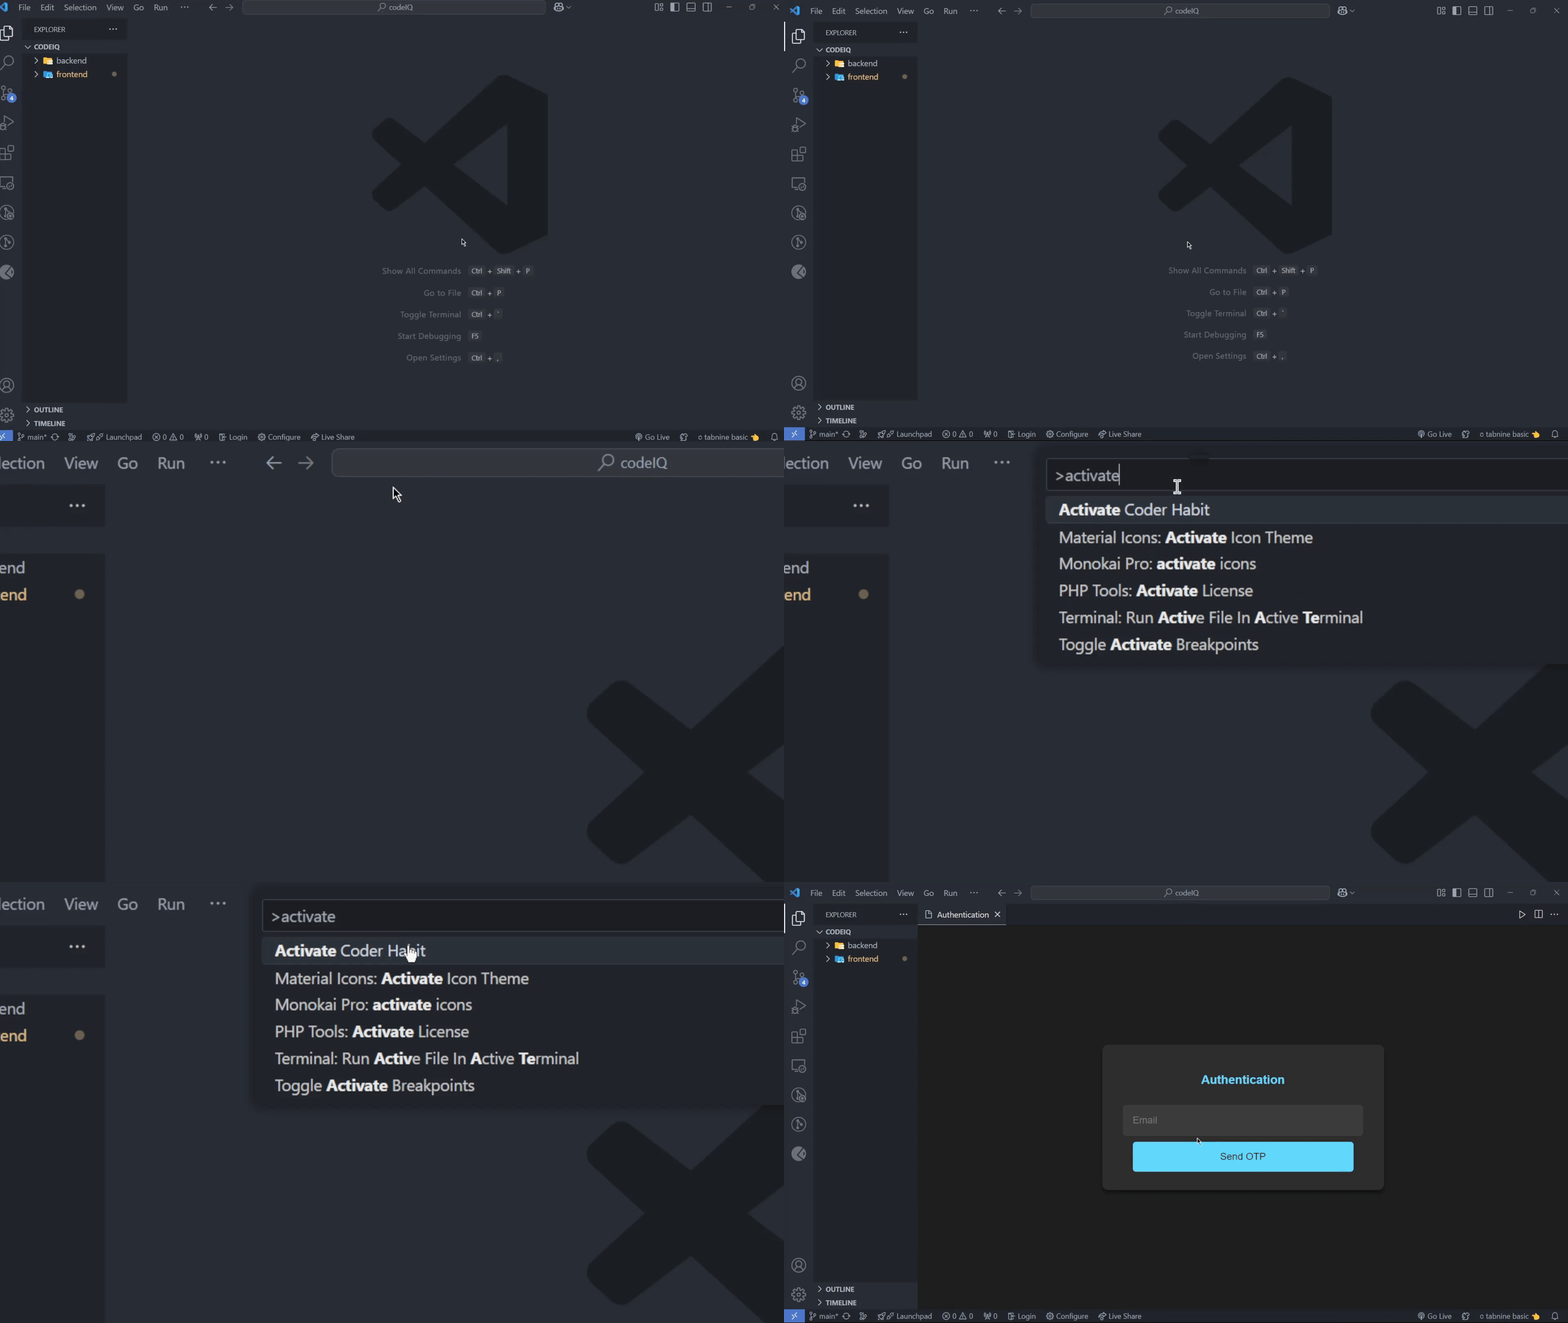
Ctrl + Shift + Pto open the Command Palette. - Type "Activate Coder Habit" and press Enter to open the authentication panel.
Here’s a quick GIF showing the login process:

If you're using coderhabit.xyz, you can simply log in after installing the extension. To create your account, follow the steps above.
Step 3: Tracking Your Activity
Once logged in, Coder Habit will automatically start tracking your coding activity. It records:
- File edits
- File saves
- File creations and deletions
Step 4: Viewing Insights
After logging in, click the "View Stats" button on your dashboard to view detailed insights. This can also be accessed by using the same command:
- Press
Ctrl + Shift + P, type "Activate Coder Habit", and press Enter to open the dashboard.

Here, you can see your productivity stats and trends.
Step 5: Generating Reports
The report generation feature is coming soon! Stay tuned for updates.